I have been debating about posting this for a while.
Tragic confession – I watch chainsaw fail videos. I can’t seem to help it! It’s like a secret indulgence.
It’s not that I want to revel in someone else’s misery. It’s not that I want to feel superior and look down on the poor souls in the video.
I just can’t resist. What did they do wrong? Could that happen to me? What would I have done differently? Is it shocking? Does it look expensive? It’s like I gotta see it.
Part of the problem is my buddies keep sending me stuff. So I can blame them?
So I had thought about posting something here, but I was reluctant for a two reasons…
1) I was loathe to admit my weakness for this alarming habit.
2) I don’t want to be known as the “chainsaw fail guy”. I really enjoy posting my thoughts about equipment here, and I wanted to shy away from cheap thrills or viral entertainment.
But what can I say, in a weak moment I’m going to throw this out there and see what you guys think.
Clip 1:
This guy looks to be wearing all the proper gear and might be a professional. But the tree is old and rotten, and all hell breaks loose while he is in a very bad position.
Clip 2:
A couple of things went wrong at the same time here. First of all, the guy’s aim was off, and he fell the tree right into another standing tree. When that happens, all bets are off, and in this case it pitched the trunk in his direction. But it looks like he pinched his saw, and instead of just leaving it and getting out of harm’s way, he wrestled with it for a few seconds. Hopefully he escaped with no injuries.
Clip 3:
This is a big boy! Everything appears to be going well until right at the end, when the sky opens up and a bunch of branches land on this guy’s head!
Clip 4:
These guys drop this tree right on this house. Looks like an expensive mistake.
Clip 5:
Whew, based on the way this guy goes about cutting this tree, what he’s wearing, etc. I suspect he has never done this before. The way this thing lands, it is going to be a huge and likely dangerous challenge to finish off. What a mess, and it’s in somebody’s front yard!
Clip 6:
Oh boy. We have an amateur perched on top of a giant extension ladder with a chainsaw. What could go wrong? We see the initial branch drop, and then with the next piece enough weight comes off that limb that it springs up a bit. That was just enough to eliminate the support for the ladder, so down comes our arborist. I would think this resulted in injury.
Clip 7:
I watched this clip several times. It looked like he was wedging this giant tree, and it fell in the direction he intended. But right on top of a house? Yikes. I hope he has good insurance.
Clip 8:
This dude does his sawing, and the heavy equipment operator does his pushing, and the end up with the tree right on a house. Another case that I can’t make any sense of.
Clip 9:
This guy is lucky he didn’t get hurt. You could see the point where he realizes the massive tree he’s cutting is going to end up on the house. Instead of running away out of the danger zone, he attempts to shove it a bit. Nope, not effective. Mayhem ensues.
Clip 10:
Oof, this is scary to watch. They guy is properly secured to a bucket truck, but when the limb comes down on the bucket he is rag-dolled, thrown out like he was a sack of potatoes.
Clip 11:
It’s kind of wild, right at the beginning of the clip you can see the Fedex truck go buy. I guess it was that guy’s lucky day. Then along comes the little economy car, and he or she gets the surprise of their life. The way that car is sitting, I’m guessing it completely ruined the rear frame and suspension. Why these guys were felling the tree right towards a public road in the first place, I can’t imagine. But to not close it off to car and foot traffic was a big mistake.
Clip 12:
This is another scary one. This guy is bucking this long but it apparently had quite a bit of bending tension on it. Once he gets past a certain point, it pops and swats him like a fly. It looks like he is struggling to stand up there at the end, hopefully he was not seriously injured.
Clip 13:
Another amateur, another tree, another house. You can see this guy notched it and put a rope on it in a feeble attempt to guard against ending crashing through the roof. Didn’t work.
Clip 14:
I’m not sure what started this tree tipping the wrong way. It could’ve been bad luck, or maybe there was something on the other side just out of frame for the camera. But the backhoe operator realized there was no saving the situation, and jumped out.
Clip 15:
I guess it’s better to drop a tree on your work truck rather than some customer’s house? I guess I would rather not do either. So suffice it to say, these guys are going to need a new truck!
Clip 16:
It looks like this guy was worried he would get shaken off the tree, so he tethered himself to it. Well guess what, he was right. Assuming he was ok and not injured… I wonder how he’s going to get down from there?
Leave a comment to let me know your thoughts.
 Sometimes I do my best thinking while I’m driving.
 I tend to get a lot of satisfaction from cleaning things up. It’s not that I’m a neat-freak. Half the time my truck is a muddy mess. My clothes might be sweaty and dirty from working all day. If you looked at some of the tools in my garage you would think I’ve never wiped them down.
 Well, the weight. That Simpson weighs 77 lbs. That might be fine if you are just using it at home, wheeling it out of your storage shed over to the corner of the house. But trying to get it into the bed of the truck (or worse yet the cab) is a back-breaking affair.
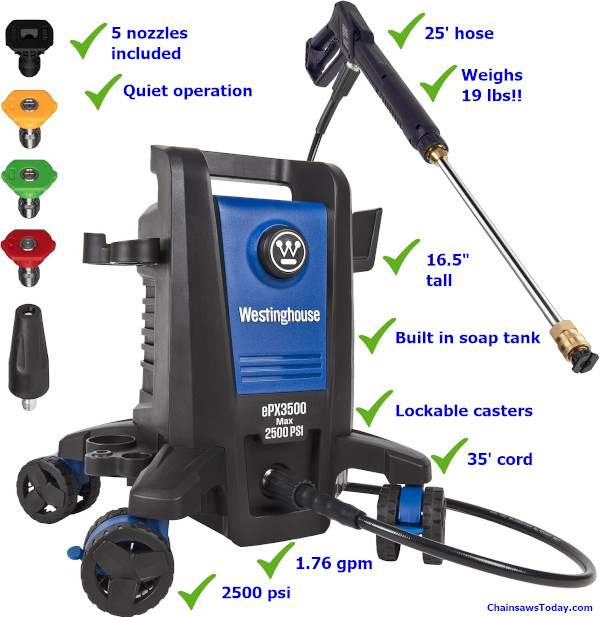
 Setup was easy, and all of the attachments were well packaged.
 It has plenty of power. It took the grime off vinyl siding with no sweat. I think tackled a big section of a concrete driveway. Even though I used it on the driveway continuously for over an hour, it did not overheat or flinch. It really seems to have as much power as the 80 lb behemoth I have traditionally used.
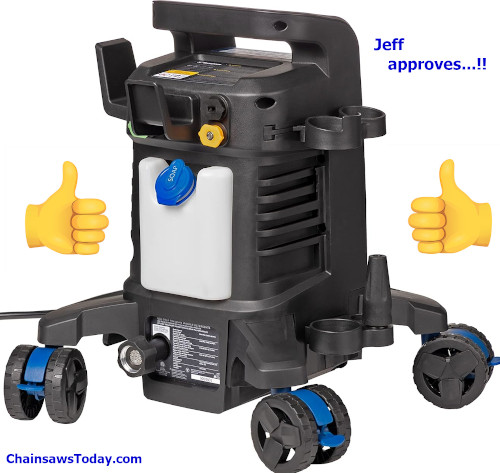
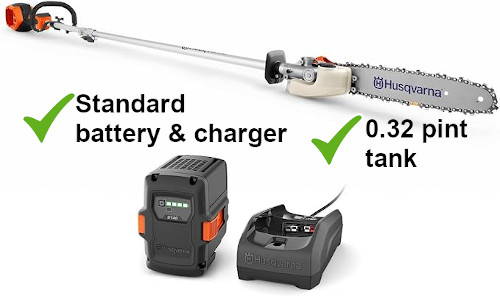
 I was pleasantly surprised at all the extras included in the box. It really is a “kit”. Included are:
 My house has central AC, handled by a big heat pump. The unit is only about 4 years old, and is relatively efficient.
 That means during the height of summer, I work my heat pump pretty hard. Ignoring the electricity costs, which can be pretty high during really cold or really hot months, I hate beating on this big expensive heat pump, knowing that it will cost a fortune to replace or repair once it wears out.
 I use a Bluetti AC200L.
 I have used one of Bluetti’s AC200P units in the past. There was nothing wrong with it, but the AC200L is a giant step forward.

 That’s what I tell myself every time I do something risky.

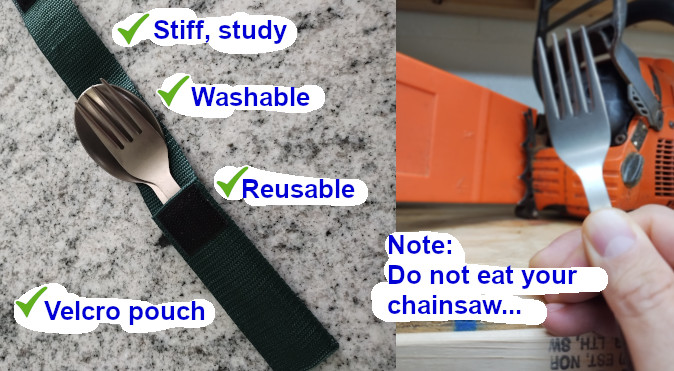
 I am sick – really sick – of using little tiny plastic forks.
 I’ve mentioned before that some saw jobs I do are in deep country.
 I’m not against going out to lunch, but I’m all about getting work done. It just seems more efficient if I pack my own meal, sort of eat on the run. It saves me from driving somewhere, waiting in line, etc.

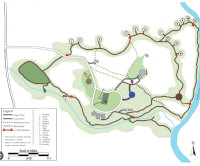 Much of the trail is not accessible by any type of motorized vehicle.
 1) You can never have too much water. Well, okay, if you took a zillion gallons and the weight was more than you could carry, of course that would be too much. My point here is doing all that hard work will make you sweat, and you are going to need to hydrate.
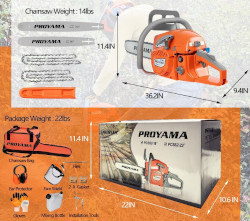
 2) A saw that’s too big is not ideal for this type of job. Using more fuel than you need is a terrible idea if you have to backpack in all of your supplies. I used a small
  3) Pack some toilet paper. I don’t want to get too personal here, but in some cases I was an hour or hour and a half walk from the truck. At even then, I would have to drive to a nearby gas station or store to find a bathroom. That’s not going to work, guys! I packed some TP, and when I had to go I did so behind a tree.
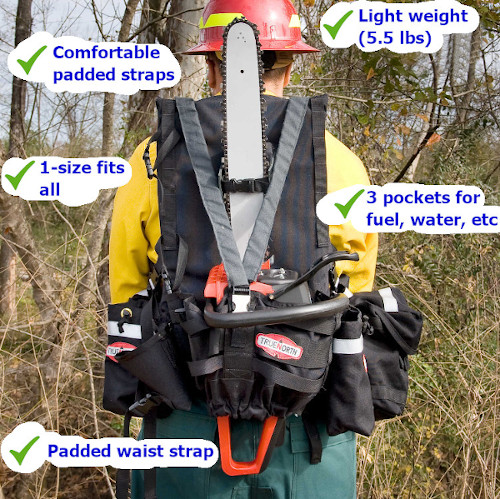
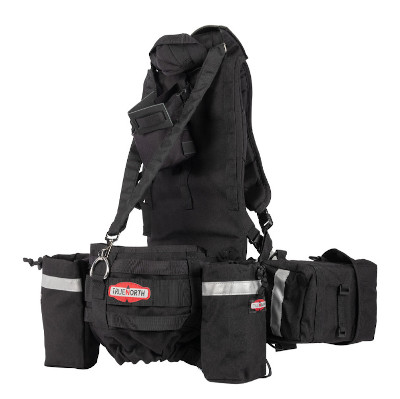
 They don’t list a weight capacity, but I figured my back would probably give out before this pack would!
 It is basically one size fits all. All of the straps are adjustable. I’m a pretty bulky guy, and it fit me just fine. Maybe if you’re more than 300 lbs or less than 100 lbs it could give you some trouble, but outside of that it was just the right size.