 These days I stay pretty busy as a local handyman.
Rarely a day goes by that I’m not cutting something up with a chainsaw, but I tend to get my hands on a lot of different types of equipment, as you’ve probably noticed reading over my reviews here on the site.
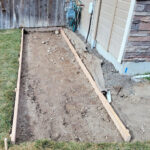
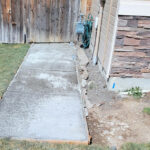
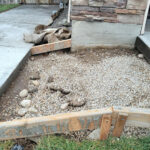
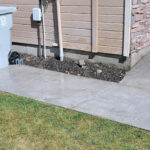
Recently, I was hired by a local to pour a concrete walk and storage area for their trash cans.
I am definitely not a concrete expert, but I’ve done a few projects before. When you look at a project this small, it really doesn’t make sense to hire a concrete team. Anything less than a full truck load of cement makes them very cost inefficient. So that leaves do-it-yourselfers like me to mix concrete a bag at a time.
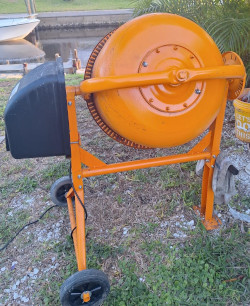
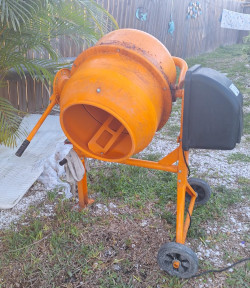 The local hardware place wanted $60 per day to rent out a cement mixer. I thought it would take me probably a day and a half, and when you look at transport time and cost, it was going to cost me right at $150 to rent one. It was apparently I could buy an inexpensive one for not much more than that, so I pulled the trigger!
Fenbeli 4.2 Cubic Foot Cement Mixer Features
You can find cement mixers as small as 1.6 cubic feet. Of course the smaller the machine, the less expensive it is. But you will ultimately be slowed down by how many batches of cement you have to mix up. Since what I was pouring was larger than just a few feet, I bought basically the biggest electric mixer I could find.
I’m not going to lie, assembly sucked!

The thing came in a box completely disassembled. I am pretty mechanically inclined, so it wasn’t that hard to figure out. There’s just a lot of parts and it takes a lot of time. That’s three hours of my life I will never get back.
I didn’t expect many features at this low price point. But Fenbeli baked a few into their mid-level cement mixer that I was happy about.
First, let’s acknowledge this is electric. The motor that spins the rotating drum is powered via standard 110/120 volt outlets. I have used gasoline powered mixers before, and I didn’t want one of those. You are constantly having to add fuel, rut out to a gas station, tinker with the carb, etc.
Having an electric one could be a drawback if your jobsite is far away from an outlet. In my case, I just ran a long extension cord around the corner of the house, and I was set.
Pro tip: You always want to position your cement mixer as close to, or actually IN the jobsite, as possible!
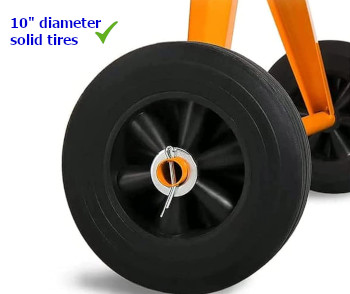
Also, it has 10″ solid rubber wheels. You guys know from my previous comments about wheelbarrows that I hate flat tires. They have a way of showing up when you are ill-equipped to fix them, and in a big hurry. Solid tires are much more expensive, but they are a good guarantee against flats, so this gets two thumbs up from me.
Lastly, they designed this with a good, wide base, so it’s stable. When you are tossing 80 lb bags of concrete in there, you don’t want something that sits like a house of cards in a hurricane.
Rotating the handle around to dump the barrel of contents into a wheelbarrow, or ideally inside the concrete forms themselves, is a simple matter. The wide base, solid tires, and flanged support leg make this quick and easy.
My Review
 My initial impression was the Fenbeli unit was good quality. It is made of reasonably thick, high quality steel. The parts line up and go together well. It seems to be well-designed, carefully packaged, and they weren’t cutting corners or scrimping on the basics.
+ Solid and stable
+ Seems durable
+ Easy to use
+ Just the right size!
– Assembly sucks
– Hard to clean
– Not a lot of good storage options
 I have made some notes above summarizing my thoughts about the mixer.
Regarding my criticisms, some of these aren’t exactly fair.
Clean-up for any cement mixer is painful. Even if you go old-school and mix in a wheelbarrow with a hoe, getting the leftovers cleaned out of your wheelbarrow always seems to take forever.
 Maybe Fenbeli’s mixer is about the same as all of them. But it did seem like the powder coat orange paint they used was a little rougher than it needed to be, and I wondered if that encouraged the leftover concrete dregs to adhere to the surface that much more strongly.
Plus, like any other mixer of this type, once you are finished using it, storing it isn’t ideal. I wanted to keep mine out of the rain and weather, so it’s occupying a spot in my shop, where space always seems to be at a premium.
More Stuff You’ll Need
 Let me save you some time and tell you all of the other stuff you’re going to need while you’re at it.
If you skip over some of this stuff, depending on what type of job you’re trying to do, it will mean you have to stop and head back to the hardware store for the stuff you forgot.
I hate unscheduled interruptions!
Bucket – You will want a 5 gallon bucket or two. Most big box hardware stores like Home Depot or Lowe’s sell these pretty cheap.
Extension cord – Hopefully you’ll be reasonably close to an electrical outlet. I keep a 100 foot outdoor cord handy, similar to this.
Gloves – You don’t want to go commando here. I like using chemical resistant gloves, preferably PVC coated. Mine are similar to these.
Finishing trowel – An 11″x4″ is pretty standard, like this one.
Float – There are a lot of different options for floats. Some people swear by magnesium floats.
Edger – I tend to use a small edger. But it doesn’t hurt to have several different sizes.
Bag/kit – The best way to keep all of these tools together is to throw them in your concrete kit back… or just buy one to start with!
Snips – If you are going to use wire mesh for reinforcement, you’ll need some side cutters. Link
Angle grinder – You will not be cutting rebar with snips! Easier to just throw an angle grinder with a cutoff wheel in the bag.
Shovels – Yes, you need shovels. All kinds of shovels. Pointy ones, flat ones, short ones, long ones!
Hammer – For the forms, you’ll use a hammer to attach the stakes to the form boards.
